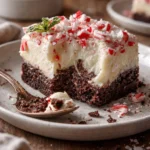
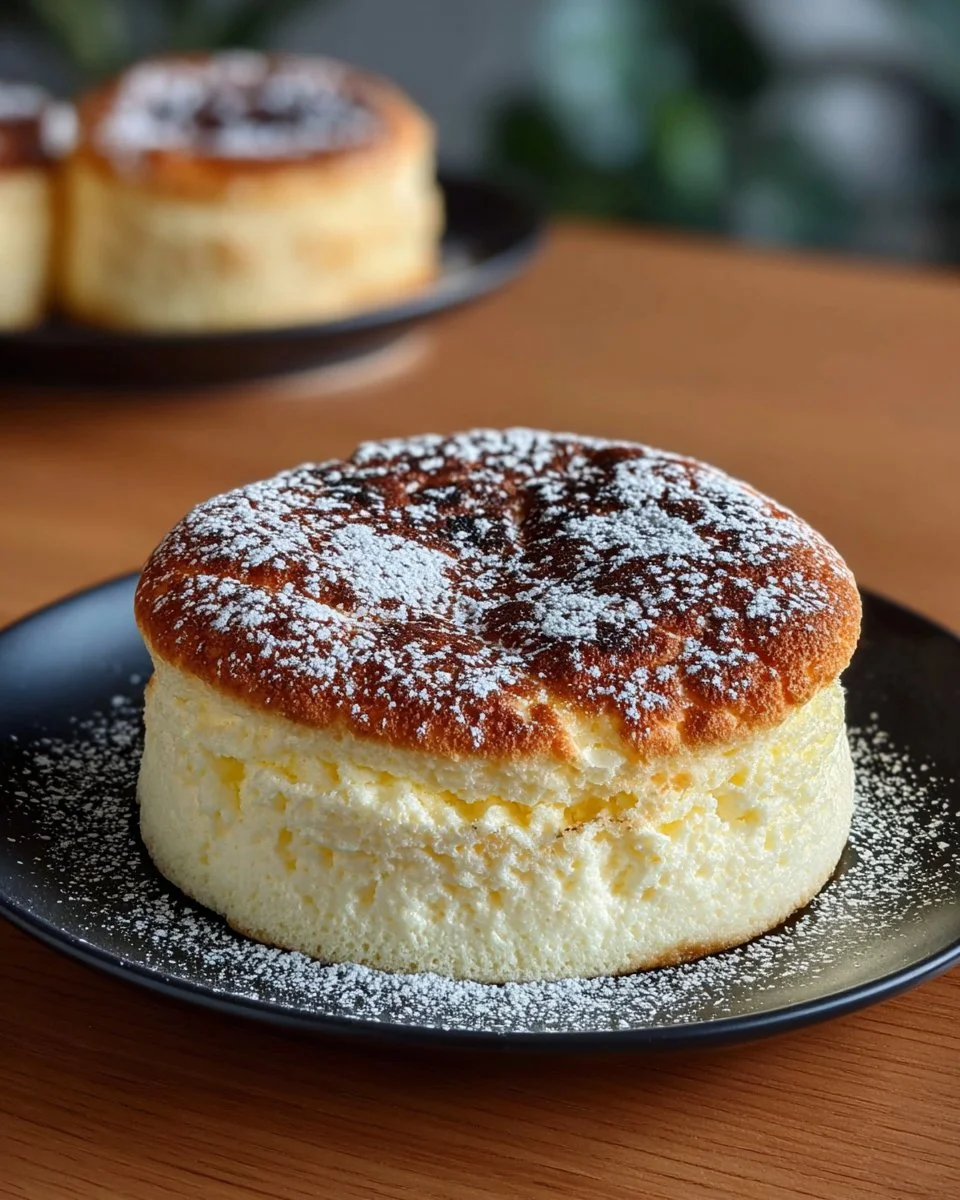
The Best Home-Baked Japanese Cheesecake Recipe
The first time I tasted a Japanese cheesecake, it felt like a dream. The way it fluffed up with airy delight, melting in my mouth like a cloud—pure magic. This delicate dessert, often referred to as "soufflé cheesecake," has the perfect balance of sweetness and tanginess. It’s creamy yet light, offering a taste that is as comforting as a warm hug. Today, I’m thrilled to share The Best Home-Baked Japanese Cheesecake Recipe, a delightful dish that can transport you right to a quaint café in Tokyo with just a few simple ingredients.
Why This Recipe Works
What makes this recipe so special? It’s not just the flavors; it’s the experience of making it. Here are a few reasons you’ll fall in love with this easy, homemade dish:
- Light and Fluffy Texture: The use of whipped egg whites creates that signature airy quality that Japanese cheesecakes are known for.
- Simple Ingredients: Most of the components are pantry staples, making it an approachable recipe for cooks of all levels.
- Versatile Delight: This cake is perfect for any occasion—from cozy family dinners to festive celebrations, it can easily be dressed up or down.
- A Comforting Classic: With its subtle sweetness and creamy texture, it’s a dessert that warms the heart.
- A Showstopper: Impress your friends and family with this seemingly sophisticated dish that is surprisingly simple to create.
Ingredient Breakdown
To create The Best Home-Baked Japanese Cheesecake, you’ll need the following ingredients:
- Cream Cheese (8 oz): Make sure it’s at room temperature for a creamy batter.
- Granulated Sugar (1/2 cup): This adds sweetness. Consider using coconut sugar for a different flavor.
- Butter (1/4 cup): Unsalted butter is recommended; it adds richness and moisture.
- Eggs (4 large): Separate the yolks and whites; this is key for fluffiness.
- Milk (1/2 cup): Whole milk gives the best flavor, but almond or oat milk can be swapped for a dairy-free option.
- All-Purpose Flour (1/3 cup): This provides structure. For gluten-free, use a gluten-free blend.
- Cornstarch (1 tbsp): Helps stabilize the cake and keep it light.
- Lemon Juice (1 tbsp): Adds a touch of brightness; you can substitute with vinegar if needed.
Prep and Cooking Times
- Preparation Time: 20 minutes
- Cooking Time: 60 minutes
- Total Time: 1 hour 20 minutes
This recipe is wonderful for a weekend project when you have a little extra time to spend in the kitchen, and the payoff is entirely worth it!
Step-by-Step Instructions
-
Prepare Your Pan: Preheat your oven to 320°F (160°C). Line the bottom of an 8-inch round cake pan with parchment paper and wrap the outside with aluminum foil to prevent water from seeping in.
-
Cream the Ingredients: In a mixing bowl, beat the cream cheese and butter until smooth. Add sugar gradually and mix until creamy.
-
Mix in Eggs: Incorporate the egg yolks one at a time into the mixture, combining well after each addition.
-
Add Milk and Starches: Stir in the milk, flour, cornstarch, and lemon juice until just combined.
-
Whip Egg Whites: In a clean bowl, whip the egg whites until soft peaks form. Gradually add a pinch of sugar, continuing to whip until stiff peaks are reached.
-
Fold It Together: Gently fold the egg whites into the cream cheese mixture, being careful not to deflate the batter.
-
Bake: Pour the batter into the prepared pan and place it in a larger baking dish filled with hot water—this water bath helps achieve that wonderful texture. Bake for about 60 minutes, or until the top is lightly golden and the center is set but still jiggles slightly.
-
Cool and Serve: Once done, turn off the oven and leave the cheesecake inside with the door slightly ajar for an hour. This will prevent cracking. Chill in the fridge for at least 4 hours before serving.
Tips and Creative Variations
- Flavor Infusions: Add a tablespoon of matcha powder or a teaspoon of vanilla extract for a flavor twist.
- Fruit Toppings: Serve it with a berry compote or fresh fruit for added dimension.
- Chocolate Lovers: Swirl in some melted dark chocolate into the batter for a decadent variation.
Serving Suggestions
Imagine this fluffy delicacy gracing your family dinner table, or possibly being the star at your next potluck. It pairs beautifully with a warm cup of green tea, making it an ideal brunch treat or an elegant dessert for your holiday gatherings. Picture your loved ones savoring each bite, their faces lighting up with joy and reminiscence.
Storage and Leftovers
Store your Japanese cheesecake in an airtight container in the refrigerator for up to 3 days. It also freezes well! Slice it and wrap each piece individually before placing it in a freezer-safe bag. When you’re ready to enjoy, simply thaw in the fridge overnight.
Pro Kitchen Secrets
- Room Temperature Ingredients: Ensure all your ingredients, especially the cream cheese and eggs, are at room temperature to blend seamlessly.
- Whipping Technique: Use a clean and dry bowl for whipping egg whites; any fat can prevent them from reaching the desired volume.
- Cooling Method: Allowing the cheesecake to cool in the oven helps prevent cracks along the top by decreasing the temperature gradually.
FAQs
-
Can I use a different sweetener?
Absolutely! You can use honey or agave syrup; just adjust the amount slightly as liquid sweeteners are not as sweet as granulated sugar. -
Can I make this ahead of time?
Yes! This cheesecake actually tastes better after sitting in the fridge for a day. -
How do I reheat leftovers?
For best results, let the cheesecake come to room temperature, or warm individual slices gently in the microwave for just a few seconds.
Conclusion
In creating The Best Home-Baked Japanese Cheesecake Recipe, you’re not just making a dessert; you’re forming memories with each fluffy slice. Whether it’s for a special occasion or just an indulgent treat for yourself, this cheesecake is guaranteed to bring joy and warmth to your kitchen. So why wait? Gather your ingredients, roll up your sleeves, and get ready to delight in the magical experience of baking something truly special. Your loved ones will thank you!

Contents
Japanese Cheesecake
Ingredients
Main Ingredients
- 8 oz Cream Cheese Make sure it’s at room temperature for a creamy batter.
- 1/2 cup Granulated Sugar Consider using coconut sugar for a different flavor.
- 1/4 cup Butter Unsalted butter is recommended; it adds richness and moisture.
- 4 large Eggs Separate the yolks and whites; this is key for fluffiness.
- 1/2 cup Milk Whole milk gives the best flavor, but almond or oat milk can be swapped for a dairy-free option.
- 1/3 cup All-Purpose Flour For gluten-free, use a gluten-free blend.
- 1 tbsp Cornstarch Helps stabilize the cake and keep it light.
- 1 tbsp Lemon Juice Adds a touch of brightness; you can substitute with vinegar if needed.
Instructions
Preparation
- Preheat your oven to 320°F (160°C).
- Line the bottom of an 8-inch round cake pan with parchment paper and wrap the outside with aluminum foil to prevent water from seeping in.
Mixing the Batter
- In a mixing bowl, beat the cream cheese and butter until smooth. Add sugar gradually and mix until creamy.
- Incorporate the egg yolks one at a time into the mixture, combining well after each addition.
- Stir in the milk, flour, cornstarch, and lemon juice until just combined.
Whipping and Combining
- In a clean bowl, whip the egg whites until soft peaks form. Gradually add a pinch of sugar, continuing to whip until stiff peaks are reached.
- Gently fold the egg whites into the cream cheese mixture, being careful not to deflate the batter.
Baking
- Pour the batter into the prepared pan and place it in a larger baking dish filled with hot water.
- Bake for about 60 minutes, or until the top is lightly golden and the center is set but still jiggles slightly.
Cooling and Serving
- Once done, turn off the oven and leave the cheesecake inside with the door slightly ajar for an hour.
- Chill in the fridge for at least 4 hours before serving.